
One of these days one of us will give in huh? LMAOOriginally Posted by evlgt85

Awesome save!!! That car is very cool!


One of these days one of us will give in huh? LMAO
Awesome save!!! That car is very cool!
Hey man, I try to keep my dreams alive, ya know.

Awesome find!
All that time with the windows down and no rotted interior? Was it under cover or what?

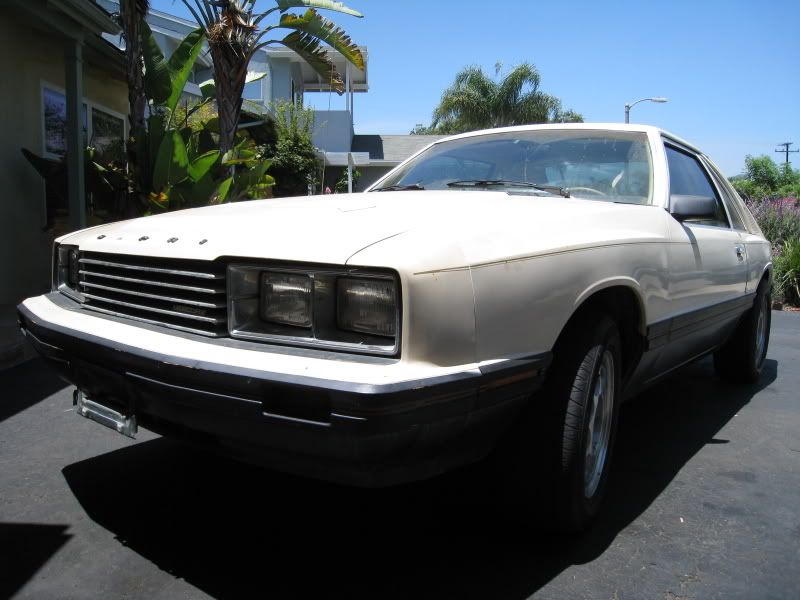
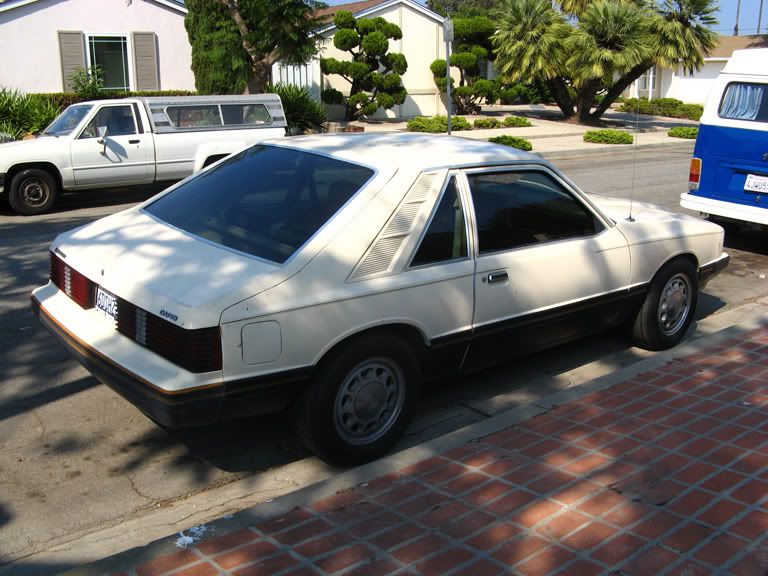
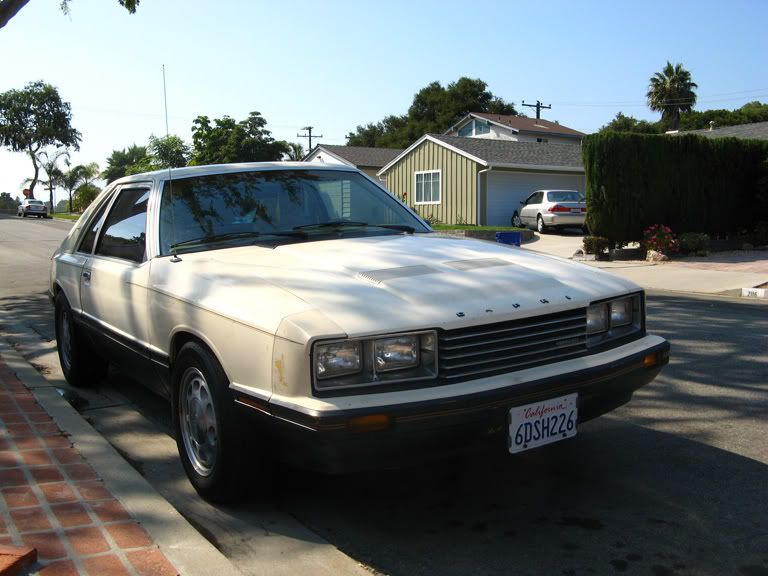
Surprisingly it was not under a cover, just exposed to the elements. The interior was just fine, just a lot of ash and mold and dirt from the rainy and fire seasons we have here.
It took a solid day of going over the interior to get every last speck of dust, even a few hours into the night. The next day I didn't work I rented the steam cleaner and put a few hours or so into it. Definitely quality bonding time with the Capri. I was even tempted to sleep in it for a night to fully establish the bond between man and machine, but.... no way I was going to scratch up that interior!
Ooo...yep, you'll fit in just fine around here.
Nice save! I had a 82 mustang coupe with the same color interior.

Man, you guys made out like bandits! i can't believe the condition of your Capri given Santa Barbara is close to the ocean salt air, the window was open for FIVE years, and it was in a wrecking yard. My ex-cop car came from San Bernardino County (dry almost desert) but sat in El Rio (closer to the ocean) for about 5 years and it had moss and lichen growing all over it and the roof and cowl were rusted through just because of some holes for the cop lights and antenna in the roof.
As we speak, my '84 notch is rusting just sitting!
It ain't fair, LOL!
Dean T
Proud owner of the one and only Friggin' Futura

Beautiful job! You should drive it over to the junkyard and show them it. They probably wouldn't believe that its the same car.
" We sleep safe in our beds because rough men stand ready in the night to visit violence on those who would do us harm. " George Orwell
Nice Save and detail job.I would love to save a car from the crusher sometime.

Great score.


GREAT save
Bet you get lots ofdriving around in it.

GOOD JOB, GREAT DEAL

Man, you guys ripped a page out of the "JeffClean" How-To guide on cleaning interiors. It looks AWESOME! I can't believe the condition of the seats and door panels. Very nice!
Pete Slaney
1979 Mustang Cobra
347/T-5/4.30's
420 rwhp/380 rwt (New Motor)
11.49 @ 121.86
306/T-5/4.30's (Old Motor)
307 rwhp/278 rwt
12.38 @ 111.38
Hey guys,
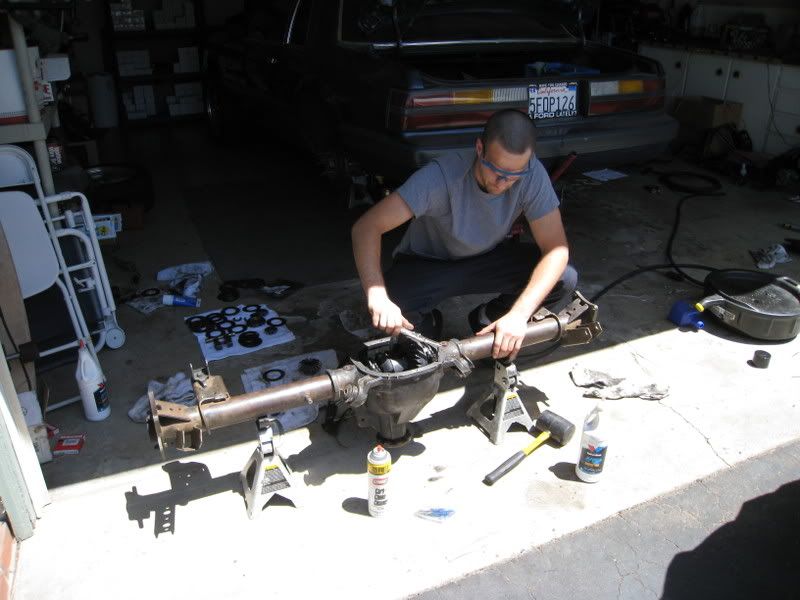
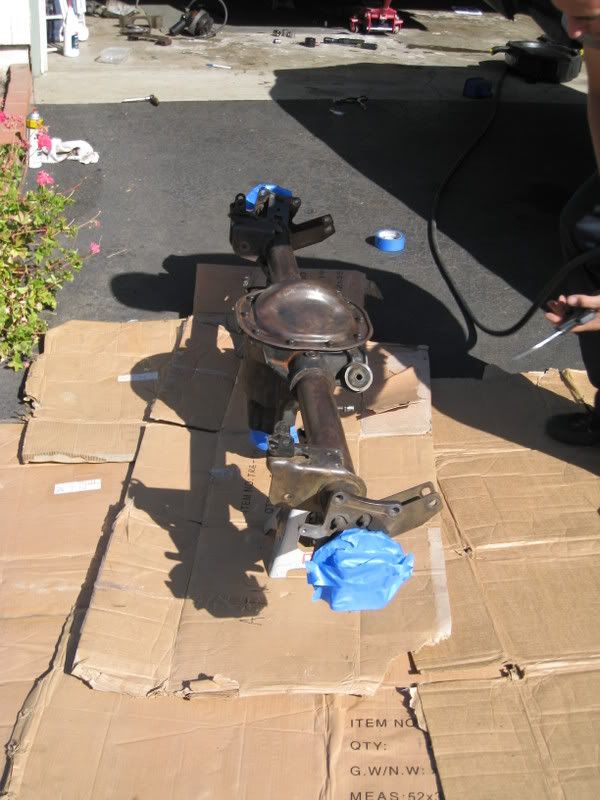
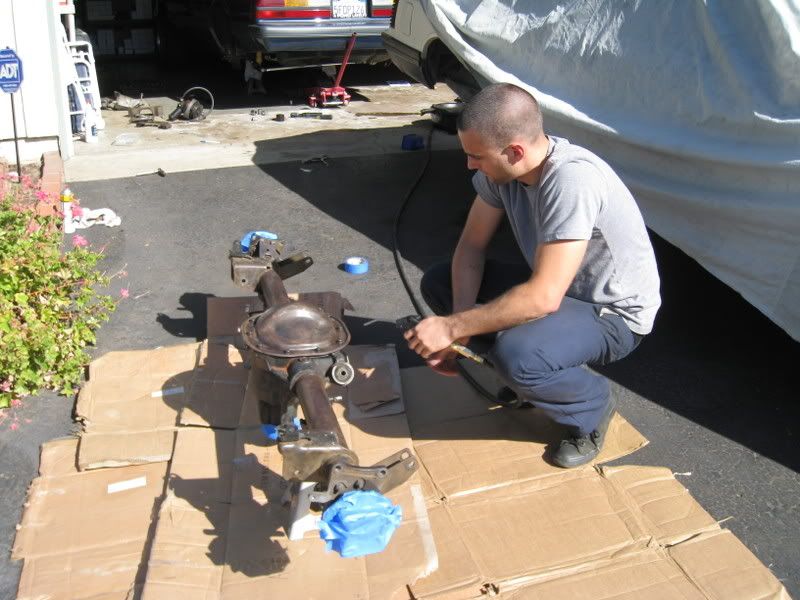
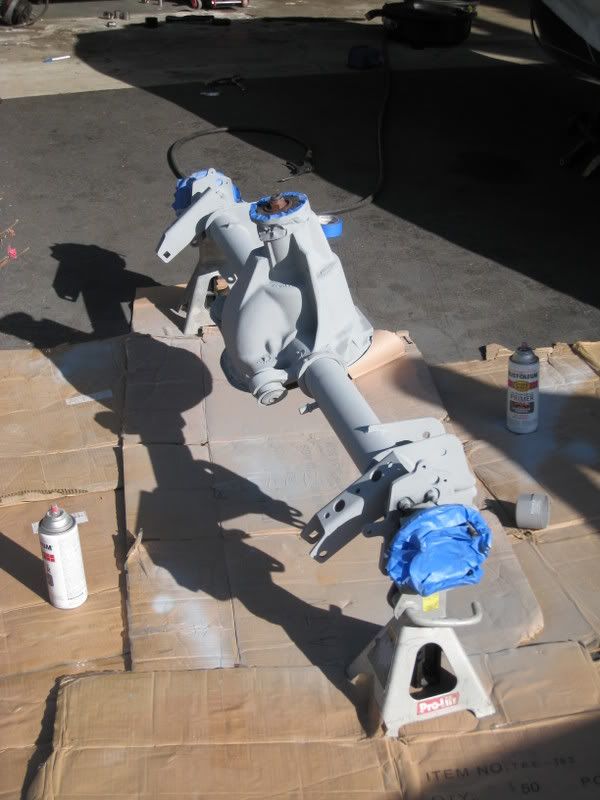
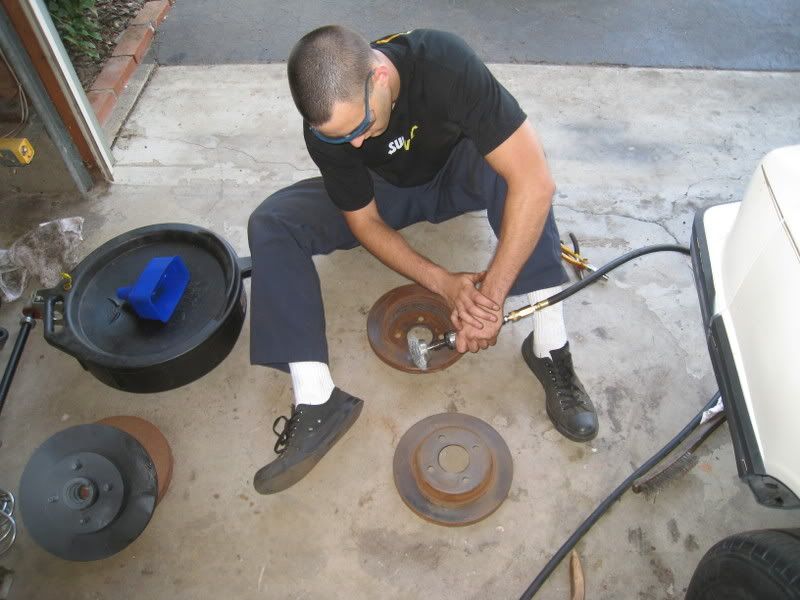
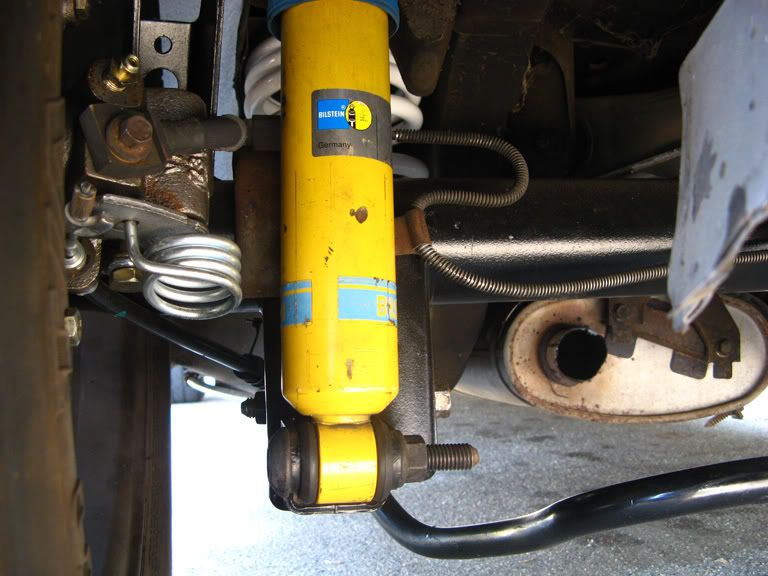
Just a little update on our Capri project. We got the 3.73 geared turbocoupe rear end that the same junkyard sold us for $150 all cleaned, rebuilt, painted, and installed. We gutted the housing, installed a new pinion seal, reset the pinion gear depth, repacked the traction-lok, and installed new axle bearings and seals. Once that was finished, we put gear oil in the pumpkin and prepped the outside of the housing for primer and paint. Once that was done, it was time to clean the rotors up (they had considerable surface rust from sitting in the junkyard for years). We used a die grinder with a wire wheel attachment, made quick business of the surface rust but didn't score the rotors. After the rear end was dry, we installed it into the car with Pro 3i weight jacker lower control arms, Ford Racing uppers, Bilstein HD shocks, and Ford Motorsport e-brake cables. We custom bent the factory hard brake line from the original 6.75" rear end and then used adaptors on each end to mate it to the turbocoupe soft lines. We reused the pads, rotors, and soft lines that came with the rearend but we had to buy a new caliper and caliper bracket (purchased online for about $70) because one of the caliper brackets was strangely tweaked. The slider pins for the caliper would get stuck inside the caliper bracket, even brand new ones. We tried filing the hole with a porting bit on the die grinder, to no avail. Steve85GT provided the adaptors and all other brake parts. Huge thanks to Steve for saving me considerable time in gathering brake parts!
My brother chasing threads for the cover bolts, we are getting ready to pack the trak-loc:
The rear all finished and ready for paint:
My brother using compressed air to prep the surface one last time:
Primered:
The original 6.75" peg leg removed from the car:
The new control arms in place:
My brother prepping the rotors with the die grinder:
The rear finally being installed!
Putting the brakes back on the rearend:
We also rigged up a crude painting box to shoot a coat of paint on the turbocoupe spindles that will be going on the front of the car:
Now that the car is back on the road with the rear finished, we will move onto the front shortly. The parts that are being installed are:
73mm SVO calipers with steel pistons
11" 87-93 V8 rotors
Bilstein HD struts w/ MM coilovers and 275 in/lb springs (relatively soft, but we chose the spring rate since it will be my brother's daily driver)
04 Cobra a-arms
MM bumpsteer kit
steering rack and pump out of a wrecked low mile 91LX
MM caster/ camber plates
MM strut tower brace
SVO aluminum master cylinder
Wilwood proportioning valve
87-93 V8 brake booster
MM k-member brace
Last edited by lxcoupe86; 06-23-2008 at 01:07 PM.
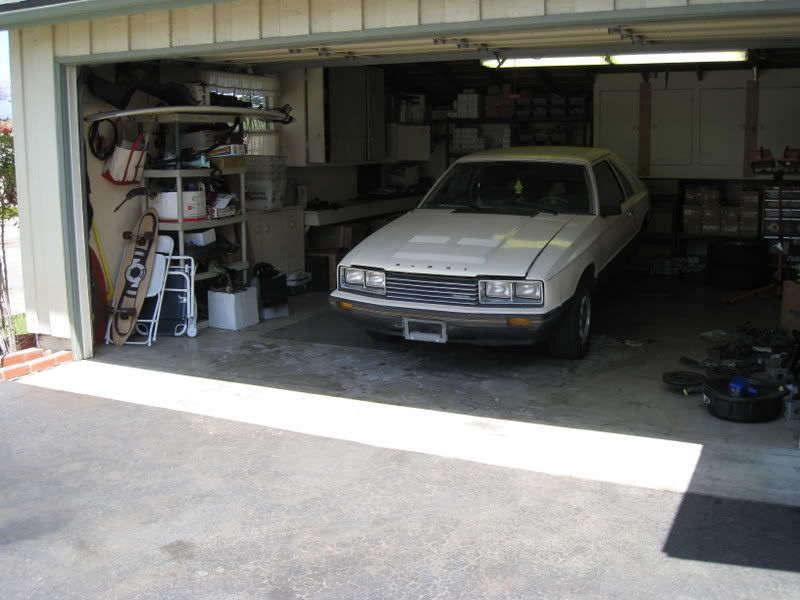
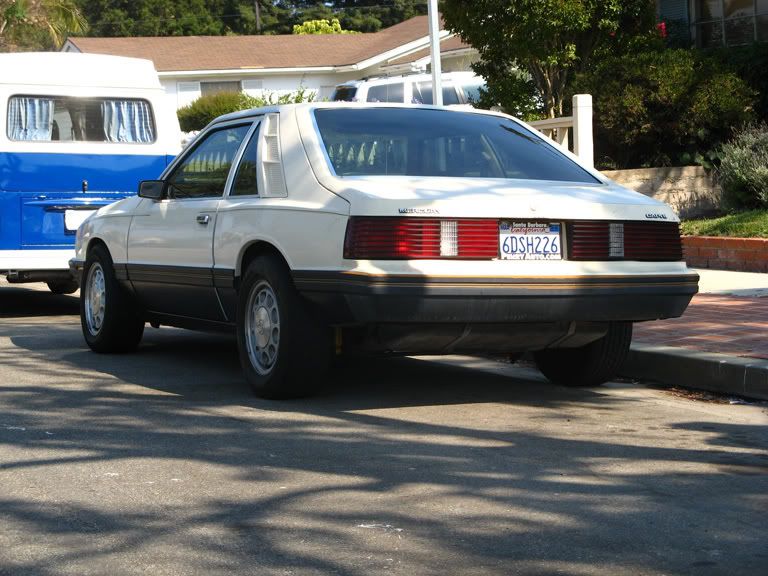
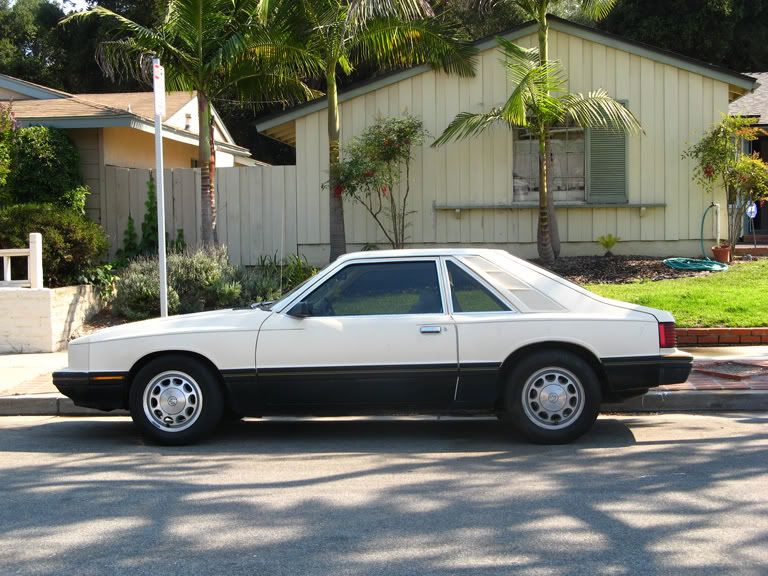
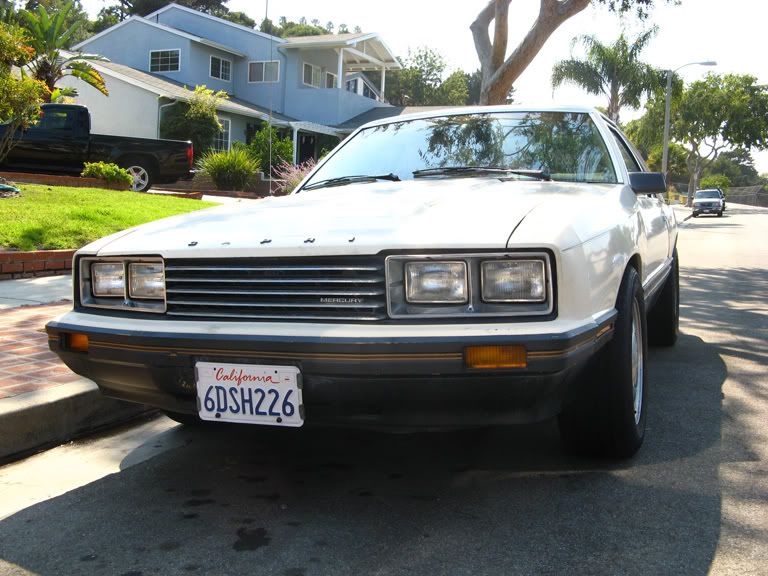
I forgot to add some outside shots of the car (yes it's quite dirty!)
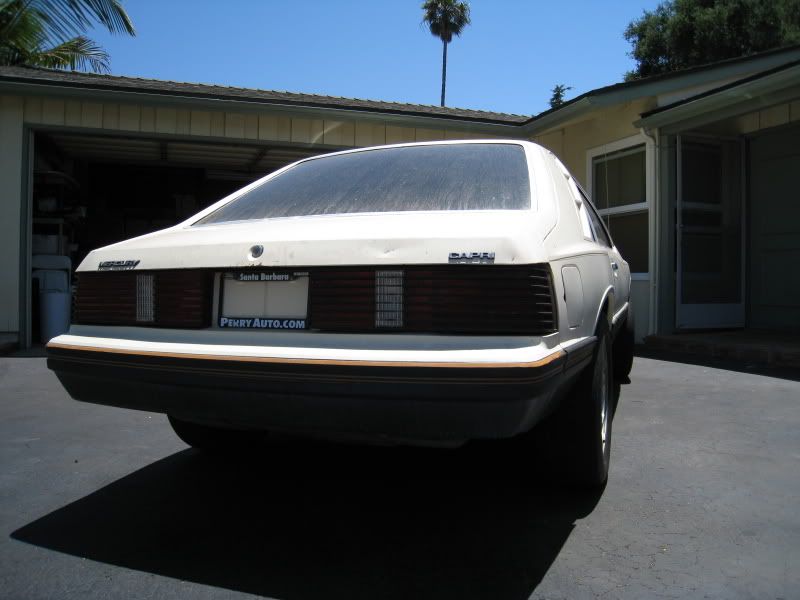
Last edited by lxcoupe86; 06-23-2008 at 03:05 PM.

Very nice guys! You'll make short work of the mods at this rate.
If you blink at the end of the straight away you'll miss the twisties and what fun would that be!
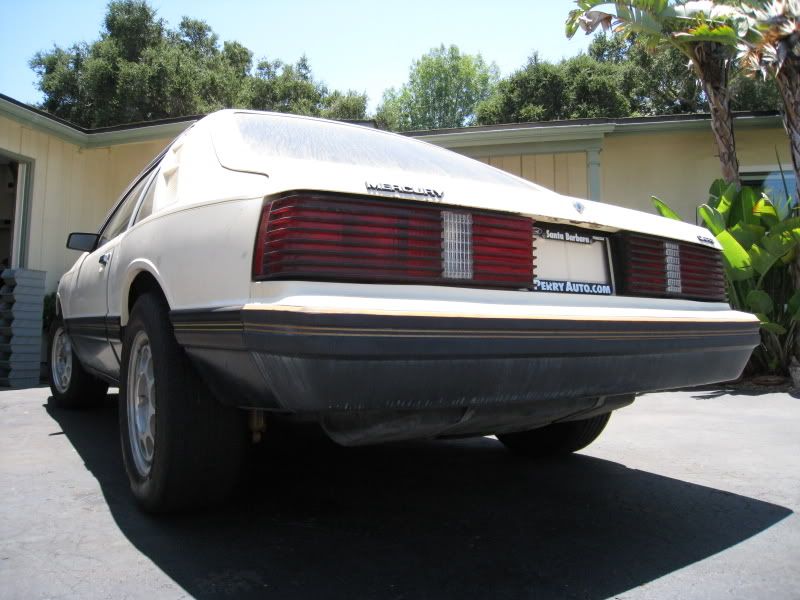
1982 Capri RS 5.0L
Suspension Build http://vb.foureyedpride.com/showthre...tion-and-Build
1985 SVO 2A & leather. Stolen & Destroyed 2022
Motor Build http://vb.foureyedpride.com/showthread.php?t=63505
Dyno stats and exhaust install http://vb.foureyedpride.com/showthre...Dyno-d-finally
My FMIC build http://vb.foureyedpride.com/showthre...-amp-D-project
Electronic boost controller and bypass valve
http://vb.foureyedpride.com/showthre...d-Bypass-Valve
Opperation SVO Tunes http://vb.foureyedpride.com/showthre...51#post1148551
Very nice! Keep on going and give us updates.
Pete Slaney
1979 Mustang Cobra
347/T-5/4.30's
420 rwhp/380 rwt (New Motor)
11.49 @ 121.86
306/T-5/4.30's (Old Motor)
307 rwhp/278 rwt
12.38 @ 111.38
Hey guys,
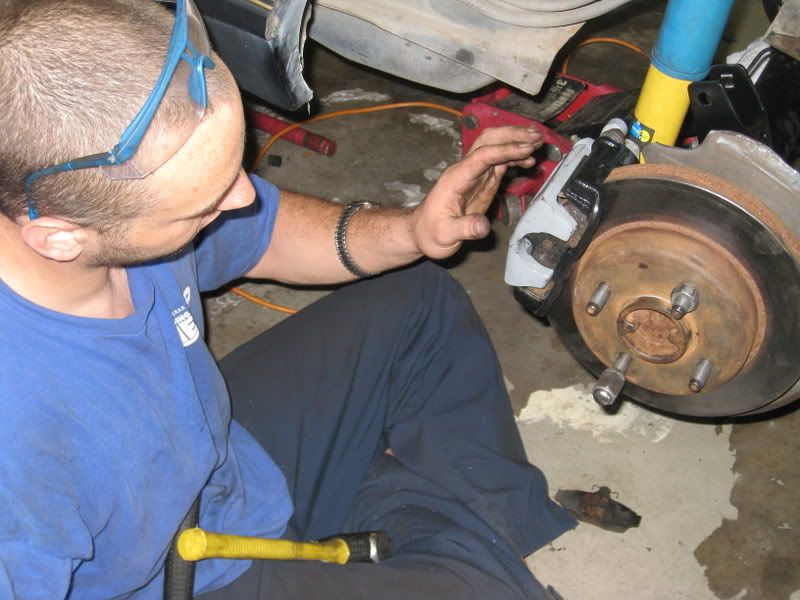
Some more updates. We wrapped up the suspension/ brakes over the weekend. Whew what a job! We ended up making some revisions to the parts list after talking to a MM tech who said that the front/ rear brake bias would be mismatched if we used the 73mm SVO calipers with the turbocoupe rear calipers. He recommended using stock 87-93 V8 calipers (60mm) which is what we did.
The parts that we ended up installing:
60mm Turbocoupe calipers (same as 87-93 V
11" 87-93 V8 rotors from the Turbocoupe
Turbocoupe spindles (I think they're the same as 87-93 V
Bilstein HD struts w/ MM coilovers and 275 in/lb springs (relatively soft, but we chose the spring rate since it is a daily driver)
04 Cobra a-arms
MM caster/ camber plates
Lincoln Towncar 1" bore aluminum master cylinder
Wilwood proportioning valve
Parts that will go in when the motor is done:
93 Cobra brake booster (installing the booster would push the master cylinder lines directly into the 2.3 EGR valve ... so it'll go in with the V
95 GT steering rack (we would have put this in but the power steering pump would have to swapped as well, which meant swapping the v-belt pulley over, we'll just wait until the motor goes in)
MM strut tower brace
MM k-member brace
MM bumpsteer kit
Ok, here are the pictures...
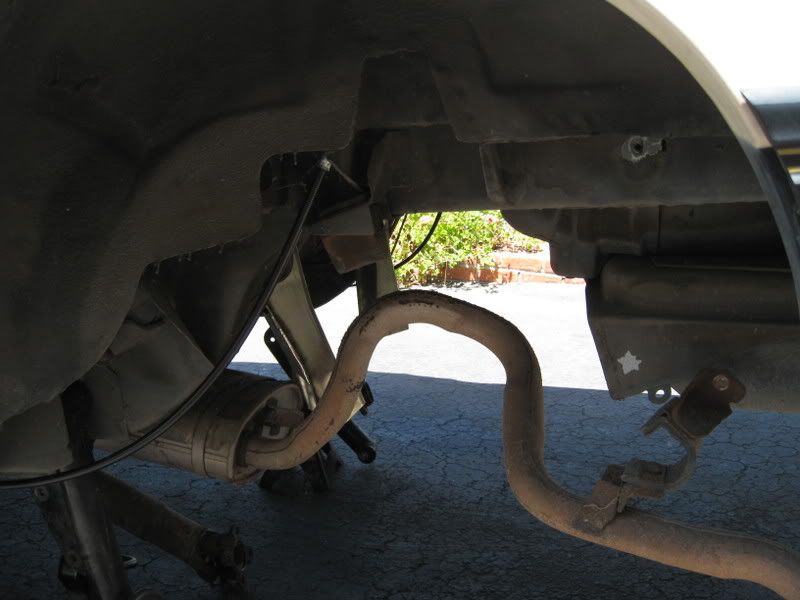
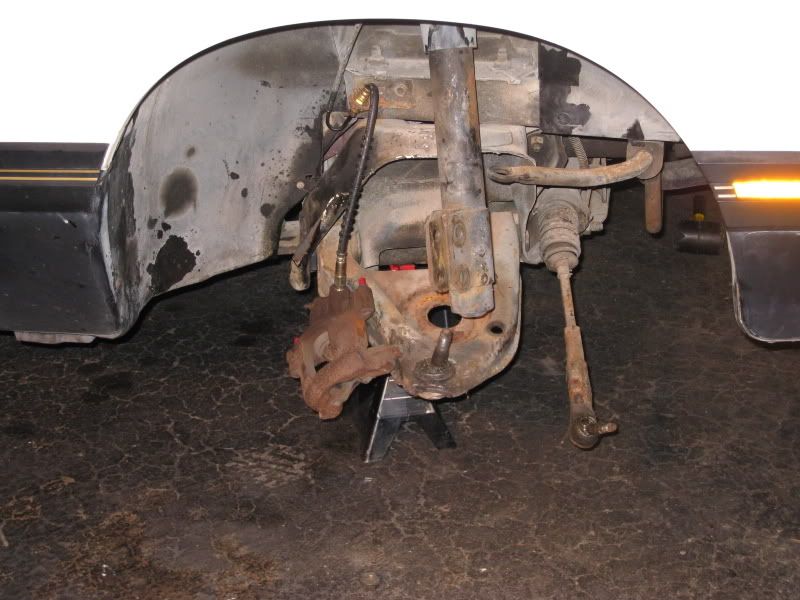
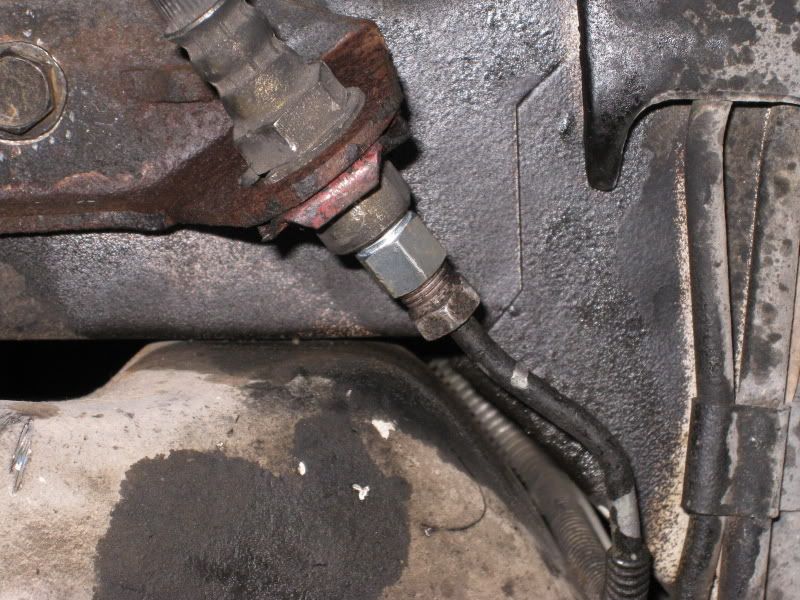
The old stock suspension (we had to install a new brake line in order to pass the brake and lamp inspection which the state requires when the car came out of the junkyard):
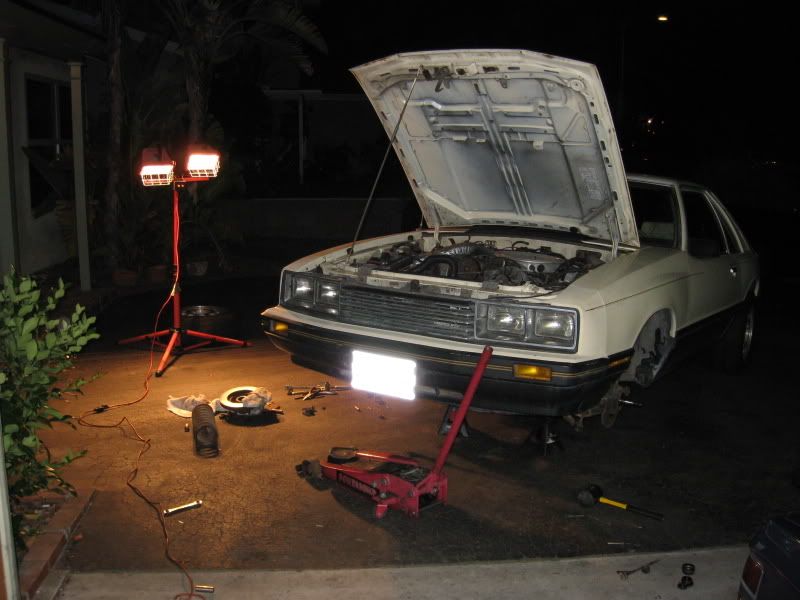
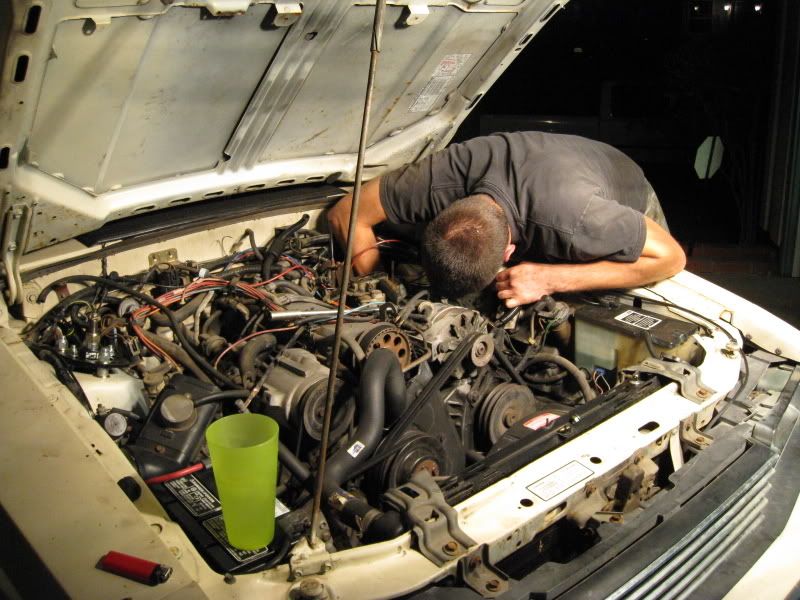
The scene of the crime, wrenching after work:
My brother tightening brake lines on the new master cylinder:
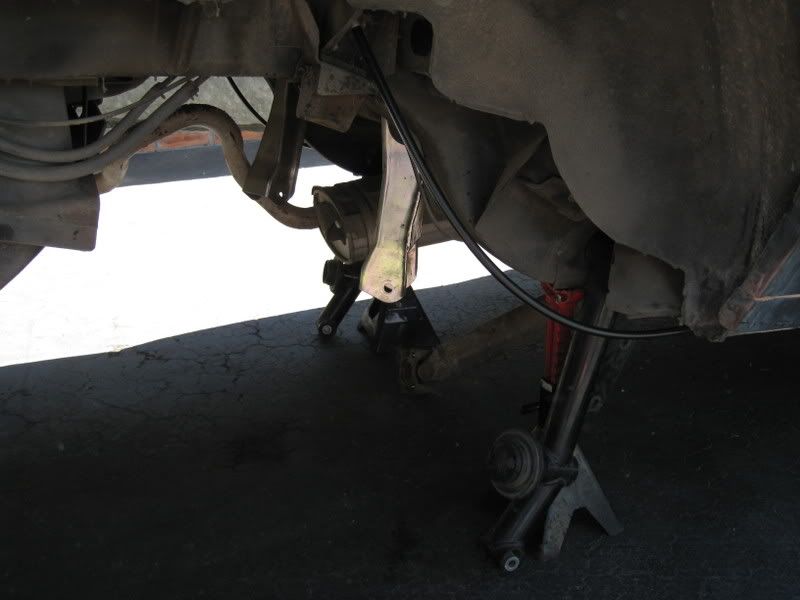
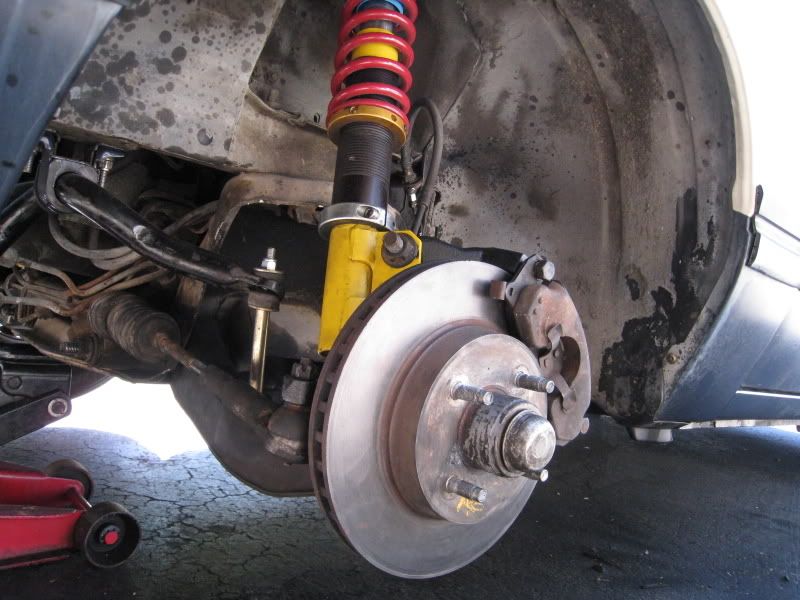
The finished front suspension:
Brake line fittings for the 87-93 V8 brake lines:
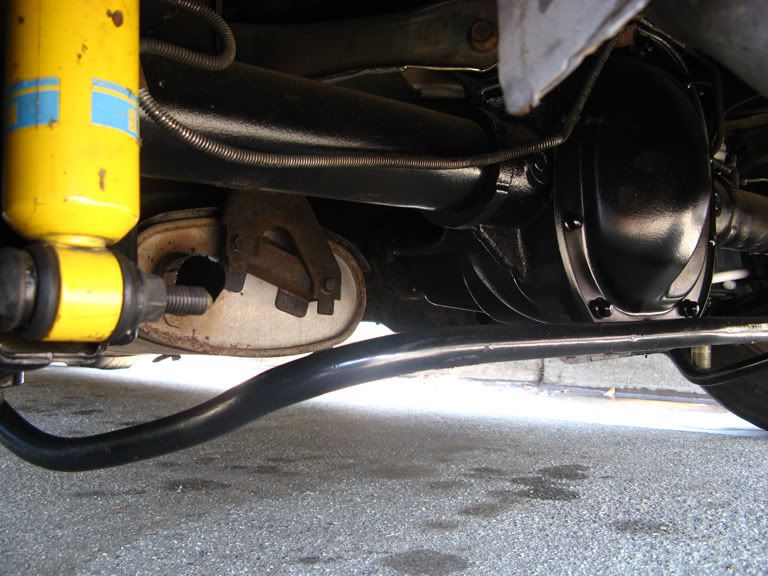
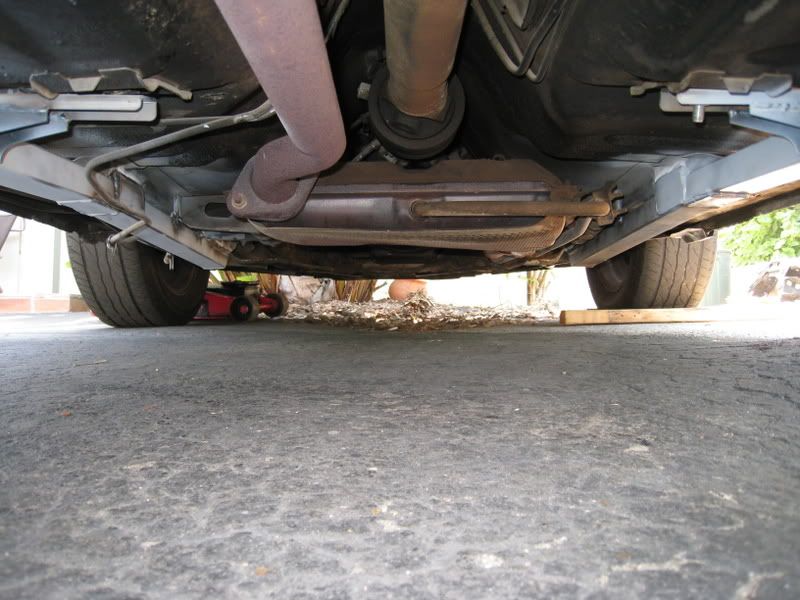
The rearend painted and installed with the V8 swaybar:
The FMS ebrake lines, "custom" bent brake lines from the stock rear end, H&R springs, and Pro 3i weight jacker control arms:
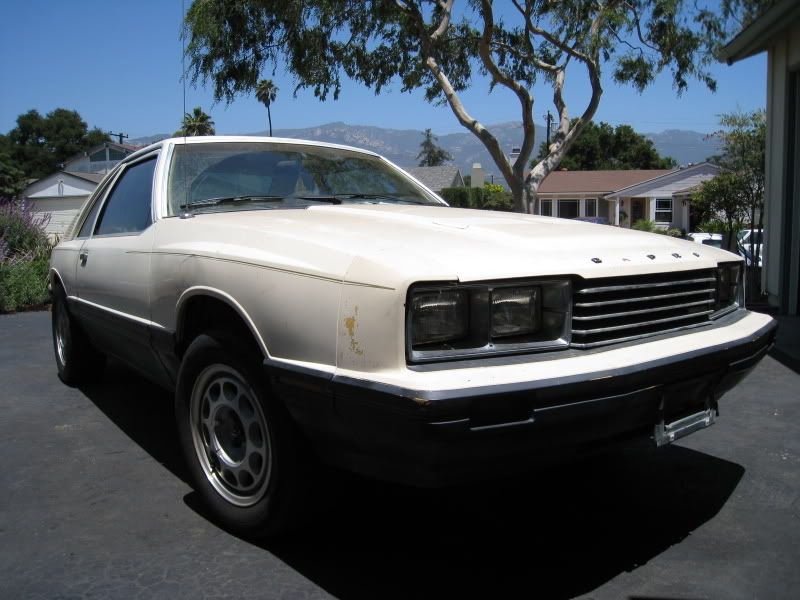
The car!
Final impressions: we badly need to install the new steering rack, as the 79-82 4cyl racks were the loosest, worst racks that came in fox bodies. We did a home alignment with a level to set camber, and a tape measure to set toe-in. The car drives straight but needs a computerized alignment, and could benefit from a bumpsteer kit. The brakes also badly need the V8 booster, as well as some fine tuning with the adjustable prop valve. Overall an ENORMOUS difference from the stock suspension and the car looks pretty tough with the stance all set!
Last edited by lxcoupe86; 07-02-2008 at 08:04 PM.


looking good

really nice! that capri came along pretty fast! wanna do my coilovers?
l?
82GTflossin
Rebuilt 302,rebuilt 8.8 w 373s,JBAs, true dual exhaust flowmasters,T5 w/Hurst Short Shifter and a few more xtras..
future upgrades: front/rear coilovers,15:1 rack,4bbl, rebuilding 89 susp with new bushings,85 carb/intake conv,jet glossy black new paint with custom graphics..
Certainly! If you wanted to make the trip down to santa barbara we would gladly wrench on an 82GT. We are pretty good at home alignments too... so you'd be able to drive back home and get a computerized alignment whenever. "DEW IT"
And to think that was crusherbait!!! You guys not only scored big time, but your work has brought another car back into the realm of "Dang man, nice ride you got there!" territory. Well deserved praise goes to you guys!
" If you're not living life on the edge, that means you're taking up too much room."
1979 Mustang Indy Pace 2.3T/4spd (sold on 1/10/16)
1983 GLX vert 3.8/auto (triple black, sold on 10/8/13)
1984 (early) Turbo GT (parts SLOWLY coming together)
1985 Coupe 4.6L DOHC/IRS swapped (sold 9/10/17)
1986 GT TTop 5spd (sold as of 10/8/13)
1988 Thunderbird TurboCoupe (Cobra IRS/Brakes/big turbo project)
Hey guys, just a little update on our Capri. We've been busy sorting out the small stuff before the motor goes in, as my brother and I both know we won't want to touch anything once it has 8 cylinders.
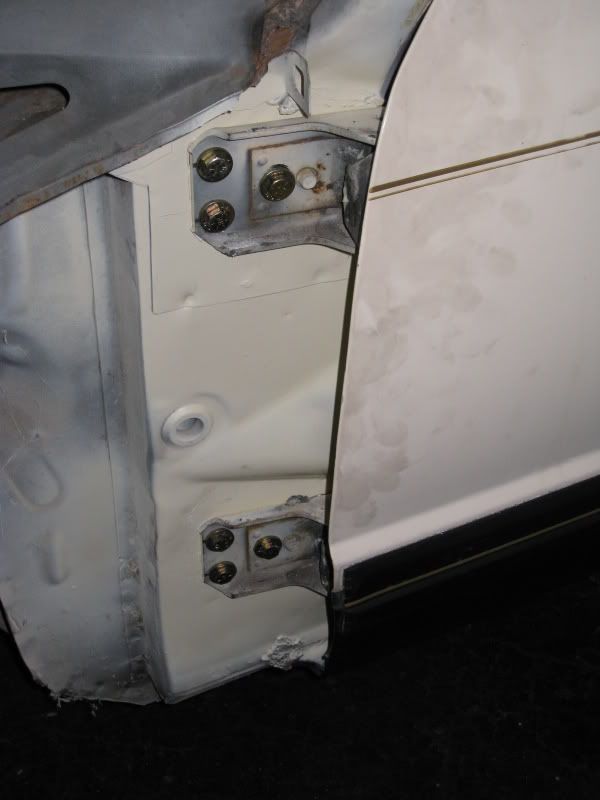
We had to replace the door pins, so while we were in there we took care of some surface rust and primed/ painted the area. We actually found a Rustoleum color at ACE that matched the stock color quite well!
primed:
finished:
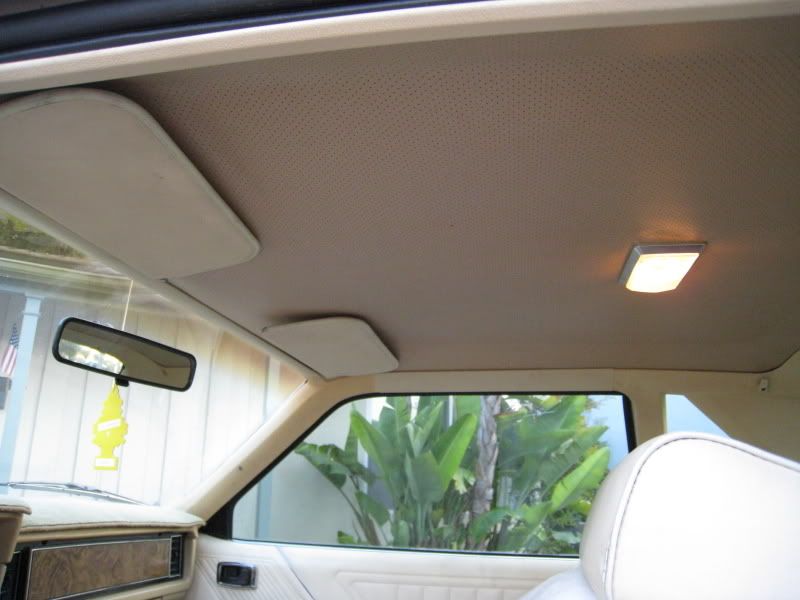
We also found a really nice headliner at the junkyard for $6 bux that matches the interior pretty well. The old one was completely hanging down and needed replacing quite badly:
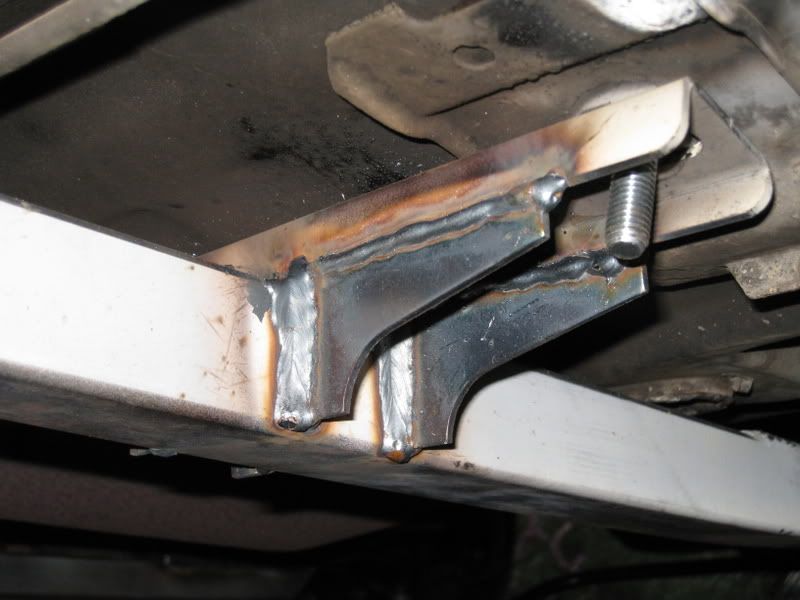
We also had our MM frame connectors welded on, as well as had two hairline cracks in the driver's side floorpan welded up. We tried to save money by prepping the subframes ourselves, stripping them with a wire wheel to bare metal so they could be welded on. We found a welder by the harbor who does mostly wrought iron fence repairs and beach cruiser bicycle repairs for the local rental businesses. He is a great welder and we were lucky to find someone so cheap around these parts.
Mr Tilford doing what he does best:
The welding:
The end result before primer/ paint:
The only other things we did was to roll the fender lips with the Eastwood tool. Since we are running the turbocoupe rear axle and SN95 front control arms, the tires had rubbed a couple times and since this is my brother's only car that will carry friends and such we thought it was a good idea.
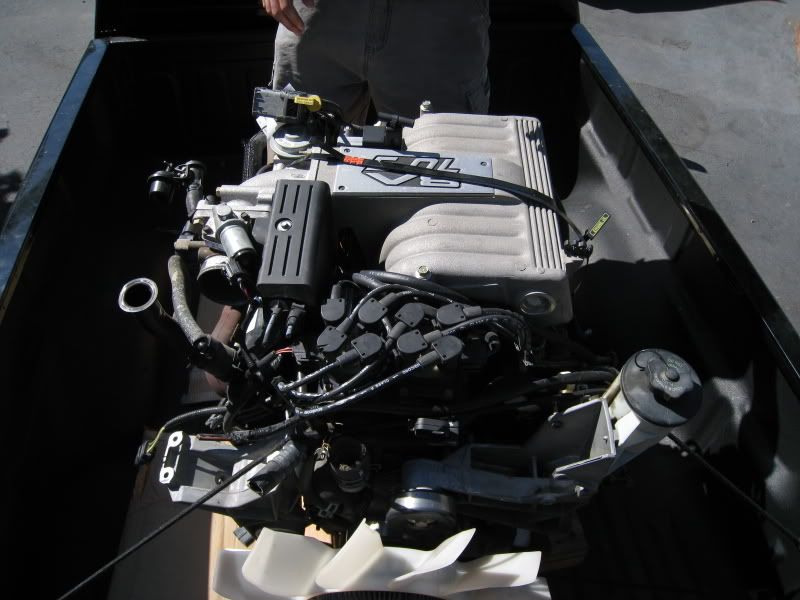
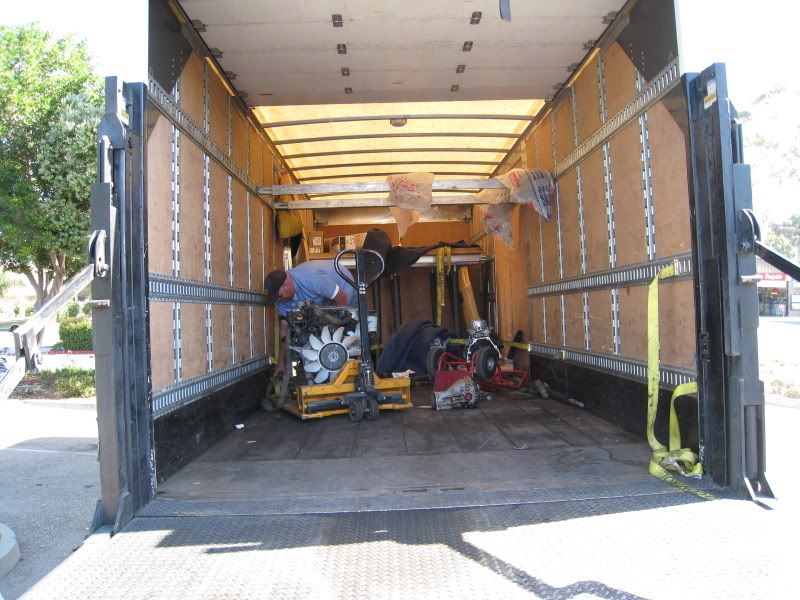
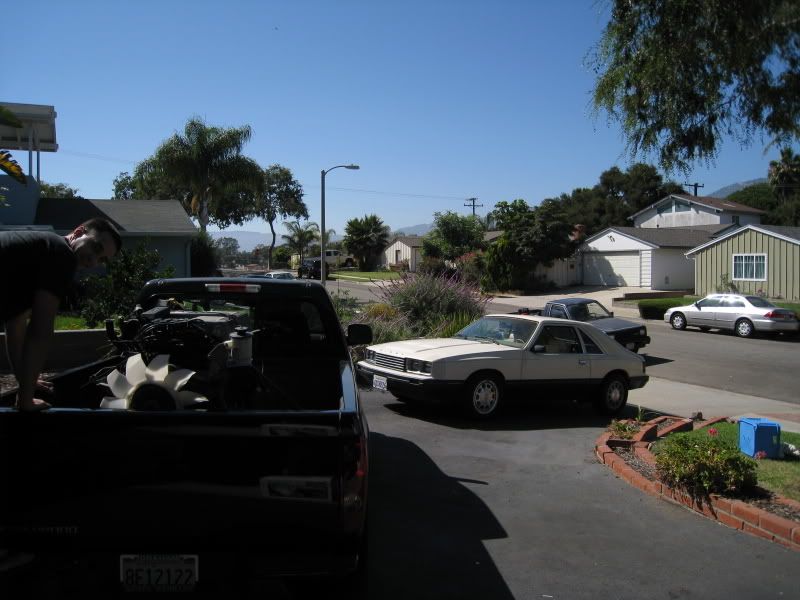
Here are the last pics of the motor we picked up, which will go in soon:
here is the delivery man getting out the motor (it was shipped in from Nevada from an online junkyard):
and my brother all happy with his new motor:
the p-head motor with 62k on it

What a save. great job, I can only wish that the one i am trying to save will look like that. what kind of steam cleaner did you use, it certainly did the job, did you use it on the seats as well.

 Reply With Quote


Connect With Us